Planting Beds
Introduction
The main planting beds are created by using the same method as the car park ie by creating a terrain. Furthermore, more detail can be added to the terrain objects after creation by adding splines. Beds that are delineated by a closed boundary can be created using a simple Subdivide modifier
Download Sample Data
kf305_files.zip (262kb)
Inner planting bed
- Either start from the previous stage or open kf305_01.max
The planting bed near the right retaining wall needs creating next using a simple Subdivide modifier:
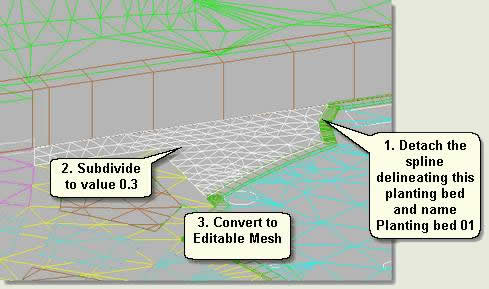
- Detach the spline delineating the planting bed: Bdy planting beds.01 shown below in spline sub-object mode
- Apply a Subdivide modifier to a value of 0.3
- Convert to Editable Mesh
Outer main planting beds
- Snap a new line to the edge of the pavement ramp
- Select this new line and Surface bed topline.02
- Create a Terrain Object
- Draw a line in the Top viewport in the middle of the terrain to control the mid points of the terrain thus:
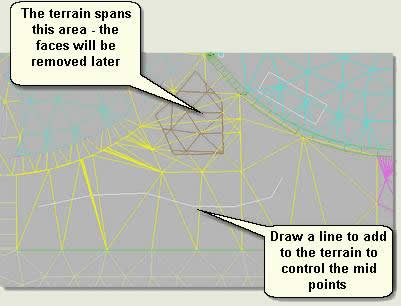
- Add the line to the Terrain Object by pressing Add Operand
- Move the vertices of the line sub-object up and down to give the bed form and relief
- Convert to Editable Mesh
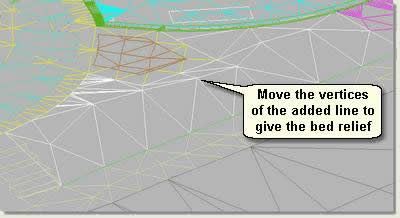
- Finally, remove unwanted faces spanning the paving area from the planting bed in face sub-object mode
- Repeat the operation with the last and largest planting bed planting bed
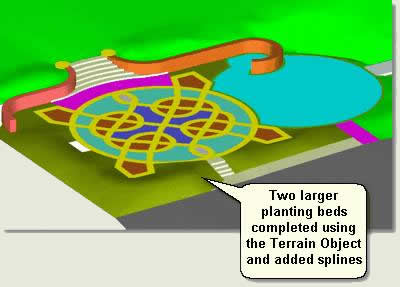
Finally add relief to the inner planting beds thus:
- Select the inner planting beds. These are called Bdy maze whole.02 if not renamed
- Isolate Selection
- Subdivide to a value of 0.3
- Convert to Editable Mesh
- Move up to a value of 0.1
- In Edge sub-object mode select the open edges and move the edges down 0.1
- Apply a Smooth modifier and turn smoothing Off
- Convert to Editable Mesh
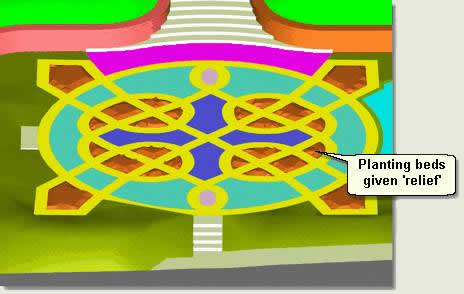
- Repeat this procedure with the smaller planting bed near the wall
- Complete the site surfaces by selecting the seat base, extruding to 0.1 and converting to an editable mesh
Donate to CADTutor
If you found this tutorial useful, you might like to consider making a donation. All content on this site is provided free of charge and we hope to keep it that way. However, running a site like CADTutor does cost money and you can help to improve the service and to guarantee its future by donating a small amount. We guess that you probably wouldn't miss $5.00 but it would make all the difference to us.
Local Navigation
Sponsored Links
The Basics
- Dual Dimensions in a Dim…
- UCSICON Options
- "Best of" Basics: Irreg…
- Tool Palette Basics
- Original Dimension Value
- Possible Solutions to th…
- Avoid Using 'Standard' i…
- Shorten the Plot Scales…
- Update the Source File B…
- User Increment Angles fo…
- Drawing Information
- 'Sign Language'
- Rotate with the Copy Opt…
- Use the INSERT Osnap on…
- To or From the Current L…


